9.1.1 Setting up JMS
Before you can use JMS, you must add a JMS client to your project’s build. With Spring Boot, that couldn’t be any easier. All you need to do is add a starter dependency to the build. First, though, you must decide whether you’re going to use Apache ActiveMQ, or the newer Apache ActiveMQ Artemis broker.
If you’re using ActiveMQ, you’ll need to add the following dependency to your project’s pom.xml file:
<dependency>
    <groupId>org.springframework.boot</groupId>
    <artifactId>spring-boot-starter-activemq</artifactId>
</dependency>
If ActiveMQ Artemis is the choice, the starter dependency should look like this:
<dependency>
    <groupId>org.springframework.boot</groupId>
    <artifactId>spring-boot-starter-artemis</artifactId>
</dependency>
When using the Spring Initializr (or your IDE’s frontend for the Initializr), you can also select either of these options as starter dependencies for your project. They are listed as “Spring for Apache ActiveMQ 5” and “Spring for Apache ActiveMQ Artemis,” as shown in the screenshot in figure 9.1 from https://start.spring.io.
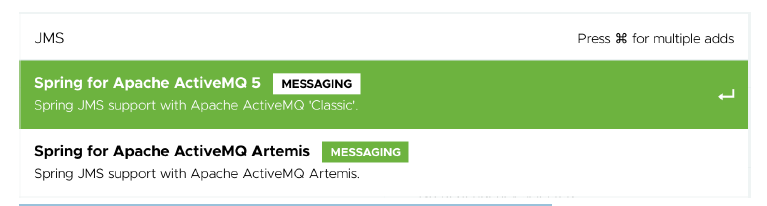 Figure 9.1 ActiveMQ and Artemis choices available in the Spring Initializr
Artemis is a next-generation reimplementation of ActiveMQ, effectively making ActiveMQ a legacy option. Therefore, for Taco Cloud you’re going to choose Artemis. But the choice ultimately has little impact on how you’ll write the code that sends and receives messages. The only significant differences will be in how you configure Spring to create connections to the broker.
RUNNING AN ARTEMIS BROKER
You’ll need an Artemis broker running to be able to run the code presented in this chapter. If you don’t already have an Artemis instance running, you can following the instructions from the Artemis documentation at https://activemq.apache.org/.../latest/using-server.html。
By default, Spring assumes that your Artemis broker is listening on localhost at port 61616. That’s fine for development purposes, but once you’re ready to send your application into production, you’ll need to set a few properties that tell Spring how to access the broker. The properties you’ll find most useful are listed in table 9.1.
Table 9.1 Properties for configuring the location and credentials of an Artemis broker
| Property | Description |
|---|---|
spring.artemis.host | The broker’s host |
spring.artemis.port | The broker’s port |
spring.artemis.user | The user for accessing the broker (optional) |
spring.artemis.password | The password for accessing the broker (optional) |
For example, consider the following entry from an application.yml file that might be used in a nondevelopment setting:
spring:
  artemis:
    host: artemis.tacocloud.com
    port: 61617
    user: tacoweb
    password: 13tm31n
This sets up Spring to create broker connections to an Artemis broker listening at artemis.tacocloud.com, port 61617. It also sets the credentials for the application that will be interacting with that broker. The credentials are optional, but they’re recommended for production deployments.
If you were to use ActiveMQ instead of Artemis, you’d need to use the ActiveMQspecific properties listed in table 9.2.
Table 9.2 Properties for configuring the location and credentials of an ActiveMQ broker
| Property | Description |
|---|---|
spring.activemq.broker-url | The URL of the broker |
spring.activemq.user | The user for accessing the broker (optional) |
spring.activemq.password | The password for accessing the broker (optional) |
spring.activemq.in-memory | Whether to start an in-memory broker (default: true) |
Notice that instead of offering separate properties for the broker’s hostname and port, an ActiveMQ broker’s address is specified with a single property, spring.activemq.broker-url. The URL should be a tcp:// URL, as shown in the following YAML snippet:
spring:
  activemq:
    broker-url: tcp://activemq.tacocloud.com
    user: tacoweb
    password: 13tm31n
Whether you choose Artemis or ActiveMQ, you shouldn’t need to configure these properties for development when the broker is running locally.
If you’re using ActiveMQ, you will, however, need to set the spring.activemq.inmemory property to false to prevent Spring from starting an in-memory broker. An inmemory broker may seem useful, but it’s helpful only when you’ll be consuming messages from the same application that publishes them (which has limited usefulness).
Instead of using an embedded broker, you’ll want to install and start an Artemis (or ActiveMQ) broker before moving on. Rather than repeat the installation instructions here, I refer you to the broker documentation for details:
- Artemis —— https://activemq.apache.org/artemis/docs/latest/using-server.html
- ActiveMQ —— http://activemq.apache.org/getting-started.html#GettingStarted-PreInstallationRequirements
With the JMS starter in your build and a broker waiting to ferry messages from one application to another, you’re ready to start sending messages.